Upcycle Old Crates to Make a Handy Home Bar, Perfect for Afternoons on the Stoep
Introduction
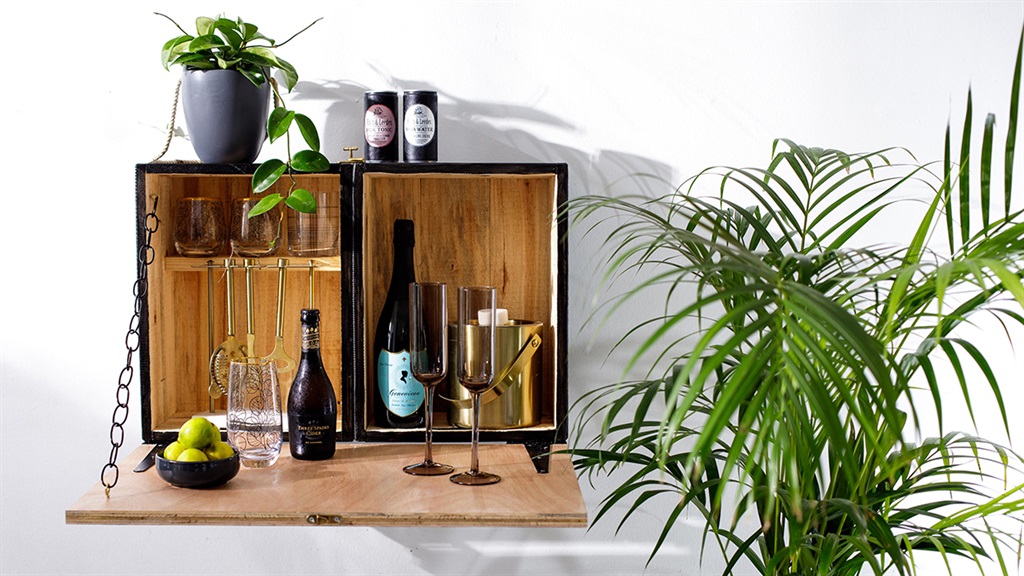
Summer evenings spent on the stoep are incomplete without a cold drink and good conversation. Why not take your stoep relaxation to the next level with a stylish and functional home bar? If you’re looking for a budget-friendly and sustainable way to create a unique piece of furniture, then upcycling old wooden crates is the perfect solution. In this comprehensive guide, we’ll walk you through the steps on how to transform ordinary crates into an extraordinary home bar that will become the focal point of your outdoor space.
Materials and Tools:
- 2 x wooden crates
- 1 x piece of timber (same size as the two crates next to each other)
- 2 x hinges
- 0.5m chain
- 2 x eyelet screw-in hooks
- 1 x latch
- Woodoc Water-Borne FLOOR Clear Matt
- Woodoc Colours in Ebony
- Mixing container
- Stirring spatula
- Paintbrushes
- Screws
- Screwdriver
Step-by-Step Instructions:
Step 1: Prepare the Wood
Before assembling the home bar, it’s important to prepare the wood. Begin by decanting about 150ml of Woodoc Water-Borne FLOOR Clear Matt into the mixing container and adding some of the Woodoc Colors (Ebony). Stir the mixture thoroughly to achieve your desired color. Apply two coats of this mixture to one side of the timber and the outsides of the crates. Allow the sealer to dry completely between coats.
Step 2: Assemble the Base
The next step is to assemble the base of the home bar. Position the two crates side by side, with their long sides facing each other. Screw the crates together to create a sturdy foundation for your bar.
Step 3: Attach the Lid
To create the lid of the home bar, attach the piece of timber to the crates using the hinges. This will form the lid of the bar.
Step 4: Add the Chain and Hooks
To keep the lid in place when it’s open, measure and mark the points where the eyelet hooks will be attached. Screw the hooks into place and attach the chain to the hooks. This chain will act as a support for the lid.
Step 5: Install the Latch
Once the chain and hooks are in place, close the lid and attach the latch at the top with screws. This will keep the lid securely closed when it’s not in use.
Step 6: Seal the Wood
To protect and enhance the look of your home bar, seal the unsealed wood with three coats of Woodoc Water-Borne FLOOR Clear Matt. Let the sealer dry between each coat. Additionally, apply one coat of clear Woodoc Water-Borne FLOOR to the sections sealed with the Ebony mixture to complete the three coats.
Step 7: Enjoy Your Home Bar
Your upcycled home bar is now complete! Place it on your stoep, fill it with your favorite drinks, and enjoy the company of your loved ones while creating unforgettable memories.
Tips:
- If you don’t have old crates on hand, you can find them at flea markets or online marketplaces for an affordable price.
- You can customize the look of your home bar by choosing different colors for the sealer or using decorative paint techniques.
- To make your home bar even more functional, consider adding shelves or drawers to store glasses, napkins, and other bar accessories.
- For added protection against the elements, apply a coat of exterior-grade varnish or sealant once the wood is completely dry.
Conclusion
Transforming old crates into a stylish and functional home bar is a fun and rewarding project. By following these step-by-step instructions and using the right materials and techniques, you can create a unique piece of furniture that will enhance your outdoor living space and provide countless hours of enjoyment. So, gather your tools, find some old crates, and let your creativity shine as you upcycle your way to the perfect home bar.